Your terracotta floors once gave you that warm, rustic charm – but lately, something’s a bit off. Maybe you’ve noticed cracks creeping in, or the fiery red tiles now look more like tired, dusty clay. Sound familiar?
If so, you might be overdue for a little terracotta floor restoration in Wollongong. Whether you’re kicking off your sandy shoes after a dip at North Beach or hosting mates on the patio in Figtree, those hard-working clay tiles deserve some TLC. And trust me, the longer you ignore the signs, the more expensive it gets.
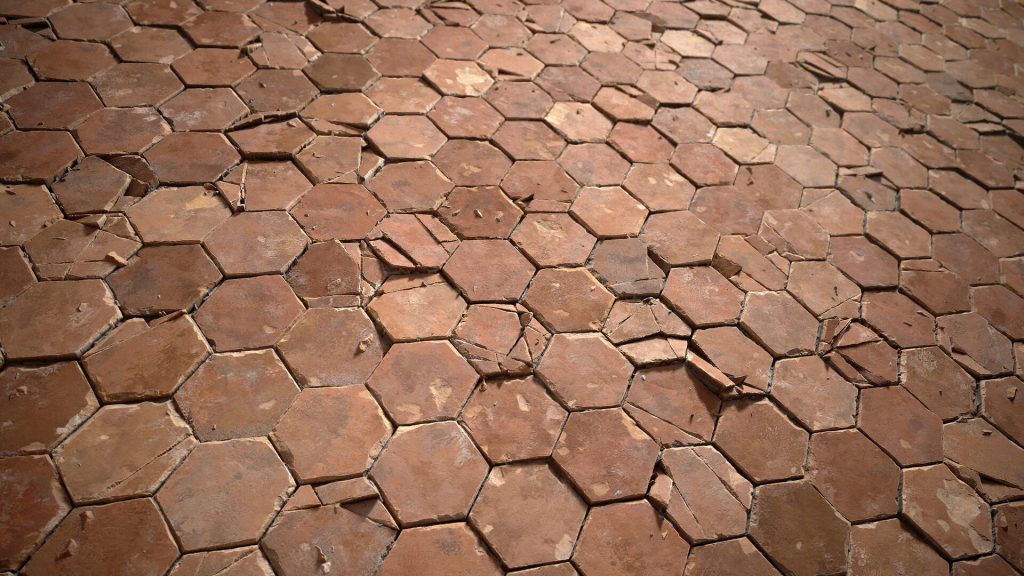
1. Cracked or Chipped Tiles
These fired-clay beauties are tough, but not unbreakable. A tiny chip today can mean a whole tile needing replacement tomorrow. If your tile edges look jagged, or you can jiggle a loose corner, it’s time to take note. Down here in Wollongong, we chuck a lot at our floors: heavy boots after a bush walk, surfboards dragged across the entryway, and even summer storms. The foundation can shift with damp or added extensions, causing tiles to snap over time.
- DIY tip: Smooth out minor edge chips with a colour-matched filler and clean the area so moisture can’t creep in.
- Look out for: Cracks spreading across the tile, or grout lines shooting upwards – those mean big movement below.
- Next step: If multiple tiles are cracking or coming loose, call a specialist. They’ll rebond and seal tiles properly so your floor stays solid.
2. Loose or Hollow Tiles
Ever walked barefoot and heard a hollow thud underfoot? That’s a dead giveaway. A tile that doesn’t sound solid is likely loose. Often the thinset or glue underneath has weakened – moisture from underground, spills, or humidity can be sneaky culprits. In Wollongong’s humid climate, the ground can shift or swell after rain, making tiles lift or rock.
- Check for movement: Press on suspect tiles with your foot. If they rock or pop out, action is needed.
- DIY approach: You might carefully re-grout or re-adhere a single loose tile as a stopgap. Just remove any old debris, apply fresh adhesive/grout, and clamp it down.
- Pro move: If whole swathes of tiles feel spongy, time to call in a specialist. They’ll lift and level the subfloor, fix any moisture issues, and re-bed the tiles properly.
3. Dull, Faded or Scratchy Surface
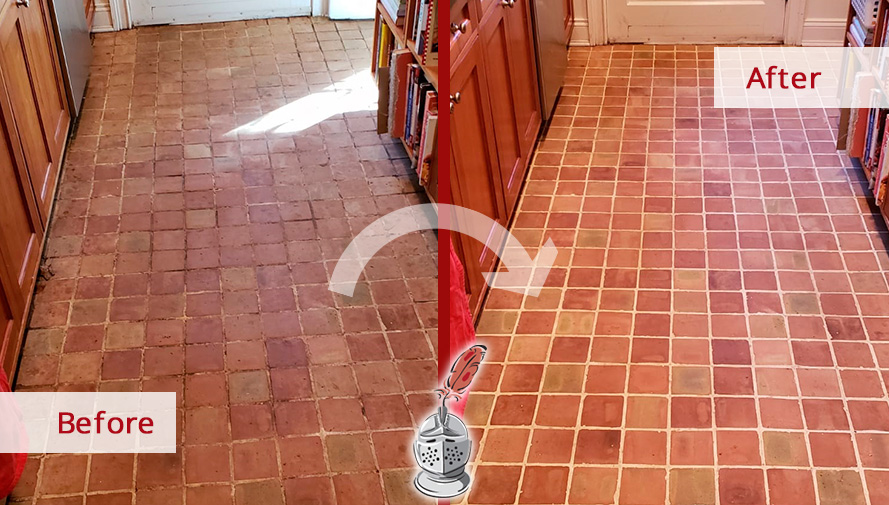
Remember how vibrant and glossy your terracotta tiles were? Now they look chalky or faded, as if someone spilled flour on them. That’s a big sign your seal has worn away. Wollongong’s strong sun and gritty sand are relentless, gradually dulling that warm glow.
Try this: deep clean the floor with a pH-neutral terracotta cleaner and buff the tiles with a soft pad. Then re-seal. One cleaning expert stresses “Terracotta tiles require regular sealing to protect them from water damage and stains.” Think of sealing like sunscreen for your floor – about once a year on average (and as often as every 6 months in busy spots).
If your floor is still lifeless after a solid clean, it might need professional buffing and a fresh seal coat. A tile specialist has machine polishers and hi-tech sealers that make old terracotta shine again.
4. Salt or White Efflorescence Stains
Here’s a Wollongong-specific flair: salt-laced breezes and high ground moisture. The white, powdery smudges you might see on tiles or grout are often efflorescence – minerals left behind when damp water evaporates. If water’s coming in (from wet shoes, poor drainage, or even a burst pipe) your floors soak it up, then let the water go, but not the salt.
- Spotting it: White or chalky stains on tiles/grout that your regular mop won’t budge.
- DIY fix: Scrub gently with warm water and a little white vinegar (it dissolves many salts). Rinse thoroughly and dry. Then fix the moisture source!
- Pro fix: If it’s heavy or recurring, pros will strip the floor and apply a moisture-blocking primer underneath. Then they seal the tiles with a special penetrating sealer that resists rising salts.
5. Stubborn Stains or Watermarks
If your morning coffee or that shiraz spill has left a mark even after mopping, it’s time to take action. Terracotta’s very porous. When the sealer thins out, any spill is basically custom wallpaper for your tile.
- DIY action: Tackle small spots with a gentle poultice. Mix baking soda or a terracotta stain remover with water to a thick paste, spread it on the stain, cover with plastic and let it draw out the oil overnight.
- Watch out for: People often think vinegar will lift stains – but on unsealed clay it can just etch or linger as a new stain.
- Pro tip: If years of spills have turned patches permanently grey or oily, it’s time for stripping and resealing. A restoration expert can power-clean the grime out of the pores and apply fresh sealant.
6. Mould, Mildew or Musty Smells
Ah, the classic coastal combo: humidity + poor ventilation = a sneaky breeding ground for mould. If your terracotta tiles are in places like bathrooms, laundries, or lower-level living areas in Wollongong’s damper suburbs (like Figtree or Thirroul), they can easily trap moisture in their porous surface.
- How to tell: Notice a persistent musty smell? Black or green spots creeping along grout lines or tile edges? That’s not just dirt – that’s mould.
- DIY steps: Use a gentle mould remover or a diluted bleach solution to clean grout and tile surface. Keep windows open, install exhaust fans, and let in sunlight to dry out the area.
- Time to restore: If mould comes back quickly or is embedded deep into the grout or tile pores, a full restoration might be needed. Pros can re-grout, replace affected tiles, and apply mould-resistant sealers.
7. Crumbling or Missing Grout
Grout is the unsung hero of tiled floors – it keeps everything locked in and sealed up tight. When your grout starts to crumble, crack, or go missing altogether, it’s not just cosmetic – it’s structural. That opens the door for moisture damage, shifting tiles, and even baseboard rot.
- Signs to spot: Gaps between tiles, powdery residue on the floor, or loose tiles that were once solid.
- DIY fix: Re-grouting small areas is manageable. You’ll need a grout saw, fresh grout, and a sealer. Just clean out the old stuff and apply new, smooth it in, and let it cure.
- Pro move: If grout is missing across wide areas or won’t hold, professionals can deep-clean, re-grout with epoxy or flexible grout (great for Wollongong’s shifting clay soils), and seal it up for long-term strength.
Terracotta Floor Restoration Cheatsheet
| Floor Condition | DIY Maintenance | Professional Restoration |
|---|---|---|
| Cracked/Chipped Tiles | Fill small cracks with matching filler; avoid heavy impacts. | Replace severely damaged tiles; add flexible joints. |
| Dull/Faded Tiles | Deep clean with pH-neutral cleaner; buff, then reseal. | Machine-polish and apply a fresh sealant. |
| Salt/Efflorescence | Scrub with diluted vinegar solution; fix leaks/drainage; dry floor. | Strip and clean; apply moisture-resistant sealant. |
| Stubborn Stains | Use a baking-soda poultice or gentle stain remover; rinse & reseal. | Strip floor, use professional stain-removers, then re-seal. |
| Mould/Mildew | Scrub grout with bleach or oxygen-bleach; keep area dry. | Re-grout affected areas; apply anti-mould sealant. |
| Loose/Hollow Tiles | Re-grout or re-bed loose tiles; avoid heavy traffic till fixed. | Lift tiles, level subfloor, re-bed and seal properly. |
| Missing/Cracked Grout | Clean out gaps; re-grout and seal the grout lines. | Remove old grout; apply new grout (epoxy recommended) and seal. |
Conclusion
All these tell-tale signs point to one thing: don’t ignore your terracotta floors. Those cracks, stains, and mould spots won’t fix themselves, and our Wollongong climate only accelerates the wear. Instead of waiting for a tile catastrophe, tackle the issues head-on. Patch cracks, re-grout gaps, and most importantly, reseal regularly.
And remember – you don’t have to go it alone. For serious fixes, tile repair, or a full revamp, contact a local Wollongong terracotta floor restoration specialist. A quick call can get your terracotta tiles looking as warm and vibrant as the day they were laid.
FAQs
How often should terracotta floors be sealed?
Most flooring pros recommend resealing every 6–12 months, especially in high-traffic areas or damp rooms. If you notice water stops beading on the surface and just soaks in, that’s your cue to reseal.
Is terracotta flooring worth restoring?
Absolutely. Restoring existing tiles is often far cheaper and easier than replacing them. A revitalised terracotta floor can even boost your Wollongong home’s charm and value.
Can I restore terracotta tiles myself?
You can clean, reseal, and even re-grout small areas yourself with the right tools. But for permanent stains, structural damage, or large-scale resealing, it’s best to call a pro.

